A simple guide to fixing CORS issues in both Development and Production Environment
fix cors issues one step at a time
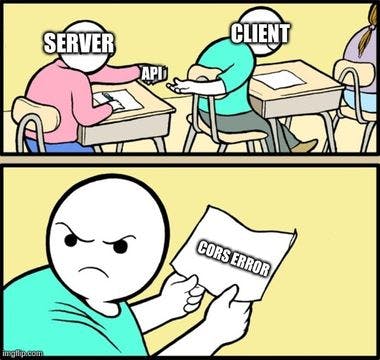
CORS or Cross Origin Resource Sharing error is one of the world wide web’s efforts at ensuring security for APIs. However, for most JAMstack frontend developers, these errors can be quite painful to resolve.

The idea behind CORS errors is not malicious – these errors exist to ensure that an API or resource is only accessible to people with the right permission to access it on the web. The first time I encountered a CORS issue while developing, it took me nearly 2 weeks to fix it and ensure a proper handshake between my frontend implementation and the API I was trying to consume (a private API I shouldn't normally have access to 😉). I decided to write this piece to help out anyone who could be experiencing CORS issues at the moment with a practical and easy way to solve this problem in both the development and production environment.
In this tutorial article, we would explore fixing the CORS issue for a Vuejs web application. However, these same steps can be followed for any type of web application regardless of the Javascript framework.
So let’s get right into it:
Fixing CORS Issue in Development (Vuejs)
The simple solution to fixing CORS issue in Vuejs is to build a dev proxy server which would connect to the API being consumed. The steps involved are:
Step 1: Create a new file called vue.config.js and enter the following lines of code:
const { defineConfig } = require('@vue/cli-service')

module.exports = defineConfig({
  devServer: {
    proxy: YOUR_API_LINK_GOES_HERE,
}
})
Step 2: Once your Dev Proxy server has been configured successfully, you can now proceed to consume your API using the localhost url of your Vuejs project. For instance, the default localhost url for Vuejs applications is localhost:8080, you can then consume your API as follows:
axios({
        method: "POST",
        url: http://localhost:8080/apiroute,
        data:{
         // your request body goes here
         },

      }).then((response) => {
          console.log(response)
          })
       .catch((error)=>{
          console.log(error)
         })
        }
      })
And that’s it, you can now consume APIs without CORS issues in your Vuejs application in development.
But this approach does not work in the live environment. So how do we fix CORS errors in production?
Fixing CORS Issue in Production (Vuejs)
Similar to the Dev proxy solution explored above to solve CORS errors in development, the solution to fixing CORS issues in production is to use a proxy server – in this case referred to as a Reverse Proxy.
A reverse proxy is an application that sits in front of back-end applications and forwards client requests to those applications. Think of it as a middle-man that interfaces between the front-end application and the APIs.
In this tutorial, we would explore creating a simple reverse proxy with Node.js to fix CORS issues in our Vuejs application. Please note that a reverse proxy can also be written with any backend programming language.
First, you need to create a new Nodejs application by entering the lines of code below:
npm init proxy-server
Afterwards, you setup your project and install the required packages: axios, cors, dotenv and express using the following lines of code:
npm i axios cors express dotenv
Now that you have all the required packages, you now need to setup your entry App.js page, Routes and Controllers which would be used to consume your API.
Create a new file called app.js and copy the following lines of codes into it:
In App.js
const express = require('express');
const cors = require("cors")
require("dotenv").config()
const routes = require('./routes/routes')
const port = process.env.PORT || 5000

const app = express();

// middleware
app.use(express.static('public'));
app.use(express.json());

// view engine
app.set('view engine', 'ejs');
app.use(cors({
  origin:"*"
}))

app.listen(port,()=>{
  console.log(`App listening on PORT: ${port}`)
})

// routes
app.get('/', (req, res) => res.render('home'));
app.use(routes)
Afterwards, create your controllers.js in a controllers folder in the root of your Nodejs application and write the code below:
In controllers/controllers.js
const axios = require("axios");

module.exports.get = async (req, res) => {
  axios({
    method: "GET",
    url: req.query.url,
    headers: {
      ContentType: "application/json",
      Authorization: req.headers.authorization,
      Channel: "Web",
    },
  })
    .then((response) => {
      res.status(200).json(response.data);
    })
    .catch((error) => {
      console.log(error);
    });
};

 module.exports.post = async (req, res) => {
  axios({
    method: "POST",
    url: req.query.url,
    headers: {
      ContentType: "application/json",
      Authorization: req.headers.authorization,
      Channel: "Web",
    },
    data: req.body,
  })
    .then((response) => {
      res.status(200).json(response.data);
    })
    .catch((error) => {
      console.log(error);
    });
};
Then for your Routes, you can create a route folder with a routes.js file and provision your routes as follows:
In routes/routes.js
const { Router } = require('express');
const controllers = require('../controllers/controllers')
const router = Router();

router.get('/api/get',controllers.get)
router.post('/api/post',controllers.post)

module.exports = router;
Explanation
The simple explanation for what is implemented above is that we created a reserve proxy with 2 APIs: GET and POST to handle GET and POST requests we plan to perform with our actual API. So the reverse proxy will simply accept the actual API as a url query and then perform a GET or POST request on behalf of the frontend to the API we wish to consume.
Once the Reverse Proxy API has been deployed, we can now consume the original API in the following format:
    axios({
        method: "POST",
        url: "https://OUR_PROXY_API/post?url=URL_OF_THE_ORIGINAL_API",
        headers: {
         YOUR_AUTHORIZATION_HEADERS_GO_HERE
        },
        data: {
          YOUR_REQ_BODY_GOES_HERE
        },
      })
        .then((response) => {
          return response
        })
        .catch((error) => {
          return error
        });
So that’s it! Your Reverse proxy is up and running and you can now receive responses from the API without issues.
Conclusion
In this tutorial, we successfully navigated the use of Proxy servers in both development and production environments to fix the dreaded CORS issues most front-end developers face. Using a Reverse proxy still remains the most effective way of consuming CORS-enabled APIs, however, other options can be explored. If you think this implementation seems too far-reaching for you, then you can easily fix CORS by simply appealing to the backend developer to whitelist the URL of your frontend application as that’s the easiest way to fix CORS issues.
